Fly Fishing Accessories!
Your source for flyfishing and flycraft resources since 1975.
We're going to break this section down into six sections:
1) Streamside Tools
2) Float/Sink Materials
3) Polarized Sunglasses
4) Fly Boxes
5) Nets & Misc.
6) Beginner Recommendations
Streamside Tools
If you plan on fly fishing on a regular basis, there is a short list of tools that you'll most certainly want to carry in your vest, on your lanyard or in your pocket. I'll give you a list of those items along with a short description of each along with why I think they're important.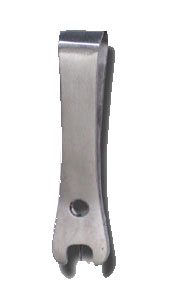
1) Nippers - Nippers are a tool to cut tippet material, either from the spool and to remove excess tippet and other materials that either get in the way or will spook the fish. Some people use their teeth for this, but you'll find that this inexpensive tool will make a 'cleaner' cut and ultimately, make it easier to work with tippet material and leaders. Most nippers also have a 'pin' in the top which is handy for opening the eye of the hook when glue or other debris gets stuck. You definitely want to purchase nippers that have this feature.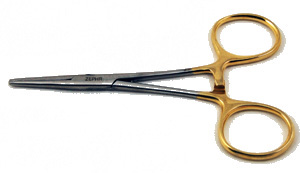
2) Forceps - Also known as hemostats, we use these to removed hooks from a fishes' mouth and to smash down the barbs on hooks when we want to fish in a barbless fashion. A 5" pair is adequate for basic trout and bass fishing. 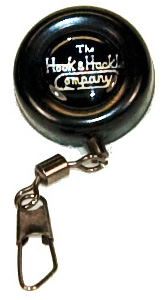
3) Zinger - This is actually a retractor reel that connects to the outside of your vest. I attach my nippers and forceps to one (each) which makes for handy retrieval and usage of these frequently used tools.
4) Knot Tyers - There are many different knot tying tools on the market for many  different kinds of knots. In my opinion, the only one that's essential to keep handy is the Nail-Knot Tool. Tying a nail-knot is difficult, if not impossible, without a special tool or tube. Since this knot comes in handy in a variety of situations, you'll not want to waste much time getting it tied correctly. These tools make it much simpler and quicker.
Floatants, 'Sinkants' & Indicators
1) Floatant - A good floatant is usually just a liquid applied to a dry fly. A small amount applied with your fingers to the fly acts as a sealant to prevent the fly from absorbing water, which will make the fly sink. It should be applied to a completely dried fly before you start to fish it. After administered, just wait a few seconds for it to dry and you're ready to go. There are many brands of floatant on the market, but you'd be hard pressed to find a formula better than our Hook & Hackle brand, no matter what the claims are by other manufacturers. You might want to purchase a floating 'caddie' which adheres to your vest and holds the floatant bottle upside down, making access and usage more convenient.
It is important to note that it is a 'no-no' to apply more floatant to a fly that begins to sink. This will only lock in the moisture which will accomplish the exact opposite of what you're trying to achieve. If you've already applied floatant and the fly ceases to float, you'll want to remove the excess moisture by drying it on a piece of material or by dipping into a dessicant. (see item below)
2) Dessicant - By far, the easiest and most effect way to remove moisture from a fly is to dip into a dessicant. This is simply a powder usually made of finely ground silica crystals. All you have to do is put your fly in the container, close the lid and then give it a shake. You can then remove the fly, give a false case or two to remove remaining powder and you'll be amazed at how high the fly then floats again. Please note that you do not have to remove the fly from the leader/tippet in order to treat.
2) Sinkants - I don't think there's such a word as 'sinkants,' but I lump these in the category of materials which make you fly sink or sink faster than they might normally. A liquid formula, like our Fly Sink, can simply be applied to the leader, fly or both. This is a simple and environmental friendly way to help get your fly down to where the fish are.
Split shot, usually made of lead, tin or steel, is usually applied to the tippet just a few inches or so from the fly. Lead shot, because of its toxicity to fish and humans, is being used less and less. Tungsten putty, which can be applied in a similar manner is gaining in popularity, simple to use and can be adjusted for any variation on weight you might want. The more I use this, the more I like it!
3) Strike Indicators - Many fly fisherman use these attached to their leader in a fashion that keeps the nymph at a constant depth and also to aids to let you know that a fish has struck the fly. These are often a very important part of the beginners' gear and most season fly fisherman use these as well.
As with so many other items, there are various choices to consider. Among them are foam (styro-foam) in a variety of shapes and sizes, putty, hi-vis yarn, adhesive backed pads and so on. I find that our slotted, tear-drop indicators in foam are among the easiest to use and adjust. They leave no residue on your leader and are easily adjusted.
You'll find that different folks have strong preferences for different methods. My best advice is to give several types a try to determine what works best for you and your style of fly fishing.
Polarized Sun Glasses
For a days fishing, these are a must! First of all, they'll protect your eyes against harmful rays and second, by cutting surface glare, will allow you to see below the water's surface when conditions permit. This will great aid to your catching!
Fly Boxes
These come in a variety of sizes and styles. The most important things to keep in mind are 1) will they hold my flies and 2) will they fit in my pocket. You may also find that 'floating' boxes are handy if you plan to have them routinely fall out of your vest - like happens to me more frequently that I like to admit. I don't think I'm the only one who forgets to zip or fasten my pockets!
Nets & Misc.
1) Net - Most fisherman bring their fish to a net in order to remove the hook from the fish's mouth. The size and shape of the net will be determined by the size and the shape of the fish you plan on catching. A rectangular or tear-drop shaped net will suffice for most all around fishing needs. Because we have a tendancy to misplace these, a magnetic net release, large zinger or other mechanism is recommended. These will allow for 'storage' of the net on your vest, easy removal for usage and then simple reattachment or retraction back to the vest. I cannot tell you how many time I've seen my good net floating down the river!
A net's bag should be fish friendly; the material should be such that the protective slime on a fish will not be removed by netting. Obviously, this will aid in the speed of recovery for the fish.
2) Tippet Spool - I like these to hold my tippet materials on the outside of my vest for easy retrieval. The typical spool will hold all the different sizes of tippet you might use.
3) Magnifying Glasses - these are a must for many some anglers that have difficulty in seeing close up. Any 'dollar store' version will do, and you can also purchase some ingenious clip ons that attach to the visor or a hat, and flip up when not in use. These are a favorite of mine.
4) A wading staff will aid in your stability when confronting strong currents. I wouldn't wade in most places without mine.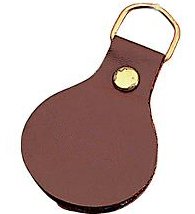
5) Leader Straightener - By running the material between the pads, you can remove the 'coil' that often appears in your leader.
Beginner Recommendations
If you're new, all of this will seem a bit overwhelming, if not expensive. To start, just make sure you leave your home with something to cut the tippet material (nail clippers will work just fine), forceps or pliers to safely remove the hook, a decent pair of sunglasses and good attitude! The more you fish, you more you'll find use for the items described above.


